Getting started
Super Connect lets your users connect their accounts on services such as GitHub, Slack or Google to your product, and lets your backend call those services on their behalf. This guide takes you from a new account to a working connection in your own app.
How it works
- Your backend asks Super Connect for a short-lived session for the signed-in user.
- Your frontend opens the connect UI with that session.
- The user picks a service and authorizes it. Super Connect stores and refreshes the credentials.
- Your backend saves the connection ID and uses it to call the service.
You never touch an OAuth token. You hold a connection ID and a user ID.
1. Create your account and organization
- Open https://super-connect.dogar.biz and choose Start free.
- Enter your name, email and a password.
- Open the verification email and choose Verify email. The link expires in one hour; signing in before you verify sends a new one. Verifying signs you in.
- Name your company. That becomes your organization, which owns every provider, connection and API key from now on.
Already have colleagues on Super Connect? Ask them to invite you from Organization → Members first. After you verify, join their organization instead of naming a company.
2. Add a provider
This guide uses GitHub. Any provider in the picker works the same way.
Register an OAuth app on GitHub under Settings → Developer settings → OAuth Apps, with this callback URL:
https://super-connect.dogar.biz/oauth/callbackIn Super Connect, open Providers → Add provider, pick GitHub, and paste the app's client ID and client secret.
Add the scopes you need, for example
repoandread:user, and choose Add provider.
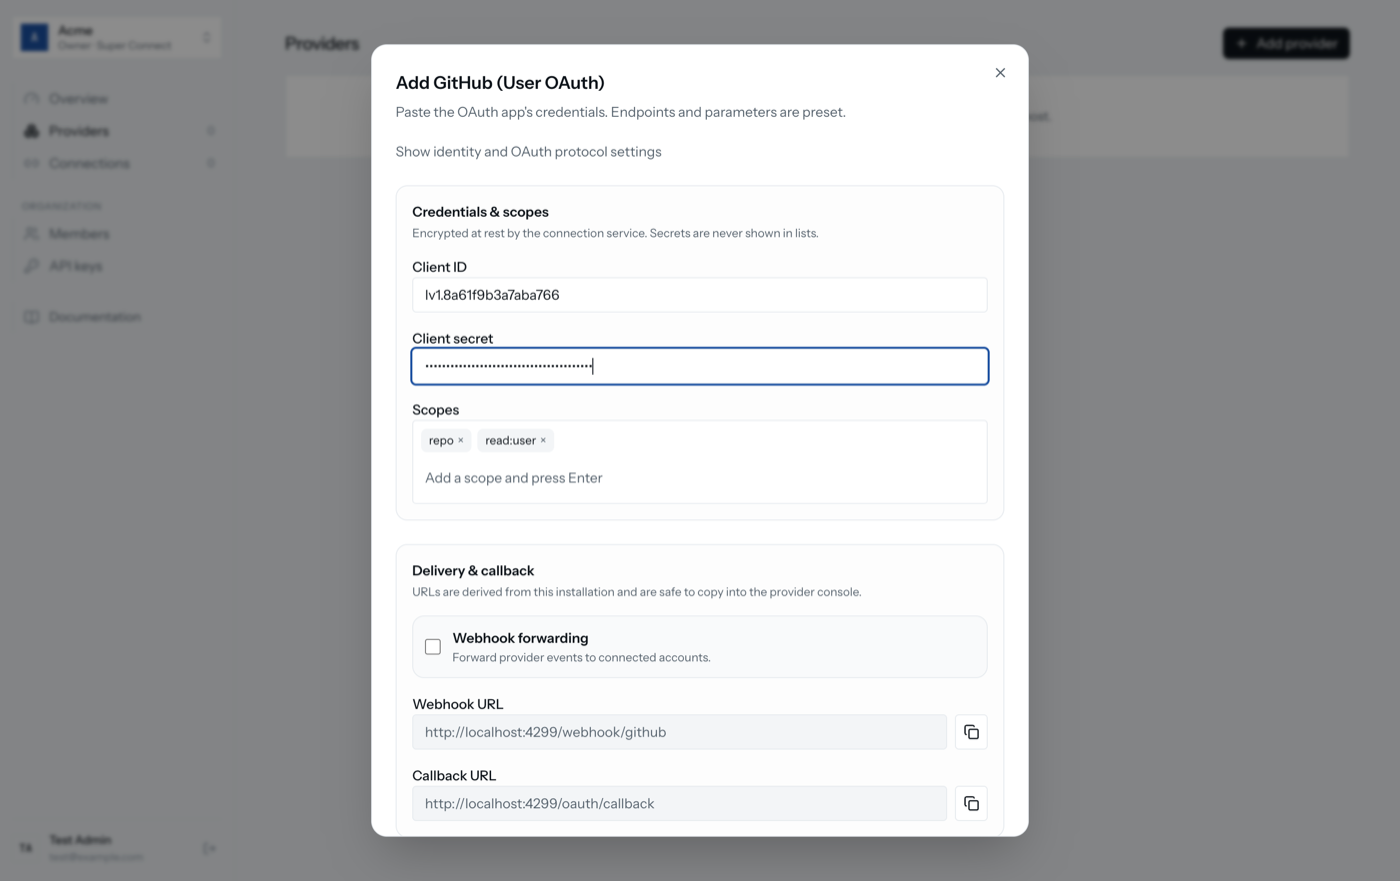
The callback URL is the same for every provider you will ever add. Secrets are encrypted before they are stored.
3. Test it from the admin panel
Before writing code, connect an account by hand.
- Open Organization → Users → New user and create a user with any ID
such as
test-user. The Users page lists, creates, edits and deletes the end users your connections belong to. - Open Connections → New connection, pick GitHub, enter that user ID, and choose Continue to provider.
- A new tab opens the connect page. Approve the GitHub consent screen.
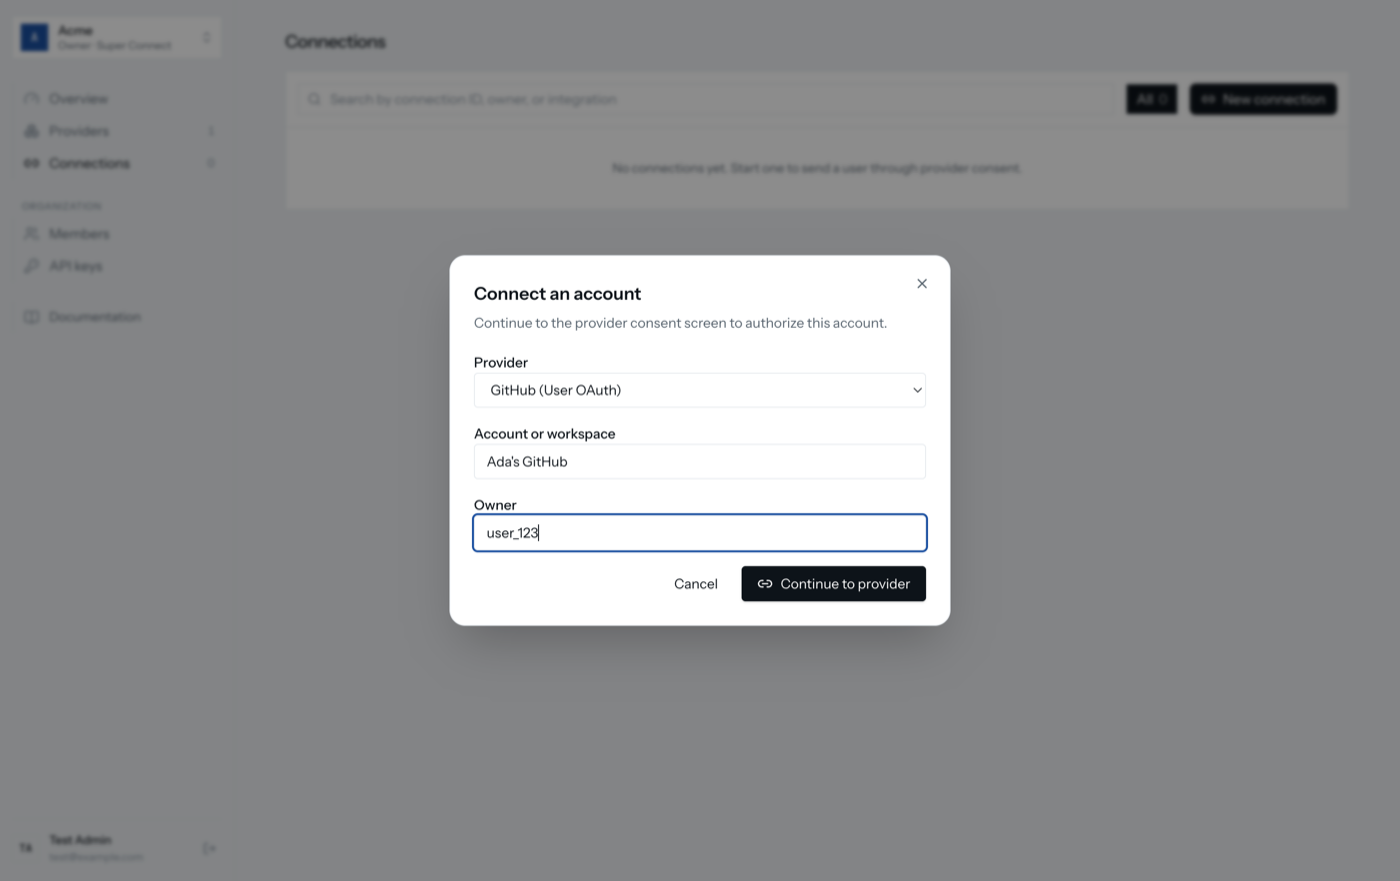
Back in Connections the new row shows healthy. That is exactly what
your users will do from inside your app in step 6.
4. Create an API key
- Open Organization → API keys → Create key and name it after the system
that will use it, for example
Production backend. - Copy the
sc_…value. It is shown once.
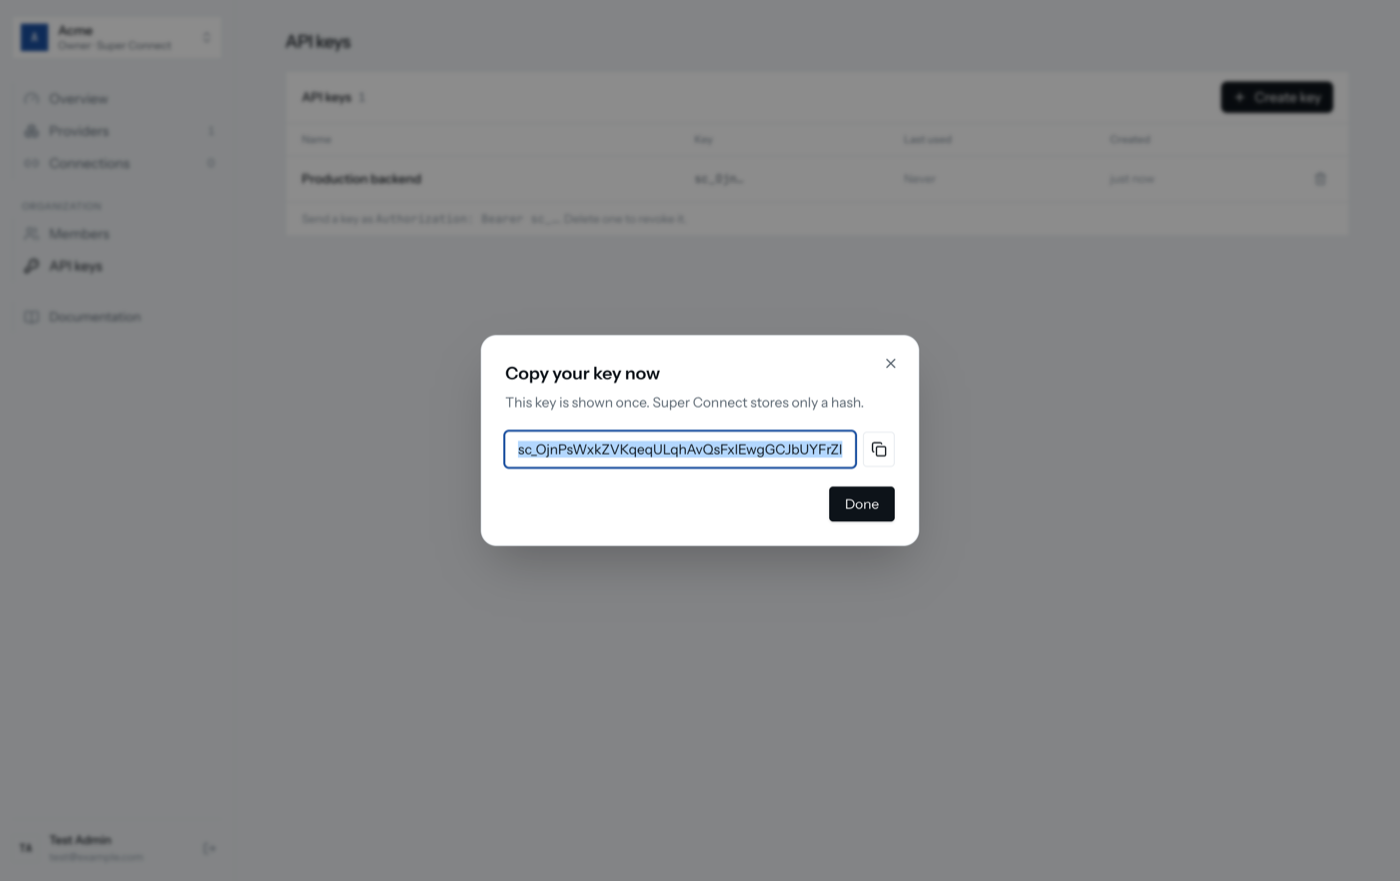
Store it as a secret in your backend. Never send it to a browser.
5. Mint a session on your backend
Super Connect needs to know your user before it can hold connections for them. Create the user once, with your own id, when they sign up or the first time they reach the connect flow:
await sc.users.create({ id: req.user.id, name: req.user.name });The call answers 409 user_exists on a repeat, so it is safe to run again.
Then add one endpoint that your frontend can call once the user is signed
in.
Node.js
import { createClient } from "@super-connect/client";

const sc = createClient({ apiKey: process.env.SUPER_CONNECT_API_KEY });

app.post("/api/connect-session", async (req, res) => {
  const session = await sc.connectSessions.create({
    userId: req.user.id,
    displayName: req.user.name,
    allowedIntegrations: ["github"],
  });
  res.json({ token: session.token });
});
curl
curl https://super-connect.dogar.biz/api/v1/connect/sessions -X POST \
  -H "Authorization: Bearer $SUPER_CONNECT_API_KEY" \
  -H 'Content-Type: application/json' \
  -d '{"userId":"user_123","displayName":"Ada","allowedIntegrations":["github"]}'
userId is the id you created the user with; an unknown id answers
404 user_not_found. The token lasts 30 minutes and works once. Leave out allowedIntegrations to let the user pick from every
provider you have added.
6. Open the connect UI on your frontend
import { SuperConnect } from "@super-connect/connect";

const handle = new SuperConnect().openConnectUI({
  onEvent: (event) => {
    if (event.type === "connect") saveConnection(event.connectionId);
    if (event.type === "error") showError(event.message);
  },
});

const { token } = await fetch("/api/connect-session", { method: "POST" }).then((r) => r.json());
handle.setSessionToken(token);
A modal opens with GitHub as the only choice. The user approves the consent
popup and the modal fires connect.
Need a link instead of a modal? The session response also carries
connectLink, which opens the same page on its own.
7. Save the connection ID
Store event.connectionId against the user in your database. It never
changes, even when tokens are refreshed or the user reauthorizes.
To be notified when a connection needs attention later, add a webhook URL to the provider through the API. See Receive webhooks.
8. Call the service through the proxy
Any request under the provider's API base, with the user's token injected:
Node.js
const response = await sc.proxy(connectionId, "user", {}, req.user.id);
const profile = await response.json();
curl
curl https://super-connect.dogar.biz/proxy/CONNECTION_ID/user \
  -H "Authorization: Bearer $SUPER_CONNECT_API_KEY" \
  -H "X-User-Id: user_123"
The user ID must match the connection's owner, or the answer is 404. A
leaked connection ID alone reaches nothing.
9. Or run a typed action
Providers with an action catalog offer operations with validated input and output. List them under the provider in the admin panel.
Node.js
const result = await sc.connections.runAction(
  connectionId,
  "get-repository",
  { owner: "octocat", repo: "Hello-World" },
  req.user.id,
);
curl
curl https://super-connect.dogar.biz/api/v1/connections/CONNECTION_ID/actions/get-repository \
  -X POST -H "Authorization: Bearer $SUPER_CONNECT_API_KEY" \
  -H "X-User-Id: user_123" -H 'Content-Type: application/json' \
  -d '{"owner":"octocat","repo":"Hello-World"}'
result.value matches the action's output schema, not GitHub's raw shape.
Run the flow end to end
- Sign in to your app as a test user and open the connect UI.
- Connect GitHub and confirm your backend stored the connection ID.
- Make one proxy call or action with that ID.
- Check Connections in the admin panel: the row shows
healthyand the call appears in its recent activity.
If a call fails, the response body carries an error.code. See
Handle connection errors.
Related guides
- Add a provider: other services, custom providers, Slack user tokens
- Manage your organization: invite teammates, roles, keys
- Receive webhooks
- SDKs and HTTP API